Learn how to make Homemade Plum Jelly that brings a burst of sweet fruit flavor to your table! This delightful spread is perfect for breakfast, snacks, or as a gift for friends and family. Its vibrant color and rich taste make it a standout addition to any meal or occasion. Plus, it’s simple to prepare with ingredients you likely already have at home.
Why You’ll Love This Recipe
- Easy to Make: With just a few straightforward steps, anyone can create this delicious jelly.
- Versatile Uses: Perfect for spreading on toast, topping desserts, or mixing into sauces.
- Natural Sweetness: You can adjust the sweetness level by using honey or other sweeteners instead of sugar.
- Long-Lasting: Store your homemade jelly in the fridge for up to six months, ensuring you have it on hand whenever you need it.
- Great for Gifting: Packaged beautifully, this jelly makes an excellent homemade gift for loved ones.
Tools and Preparation
To make your homemade plum jelly efficiently, gather the necessary tools and equipment before you start cooking. Having everything ready will streamline the process and make it enjoyable.
Essential Tools and Equipment
- Large stockpot
- Colander
- Fine mesh strainer or cheesecloth
- Metal spoon
- Clean jars for storage
Importance of Each Tool
- Large stockpot: Essential for boiling the plums and extracting juice efficiently.
- Colander: Helps separate the juice from the solid fruit quickly and easily.
- Fine mesh strainer: Ensures a smooth jelly by catching any small bits left after straining.
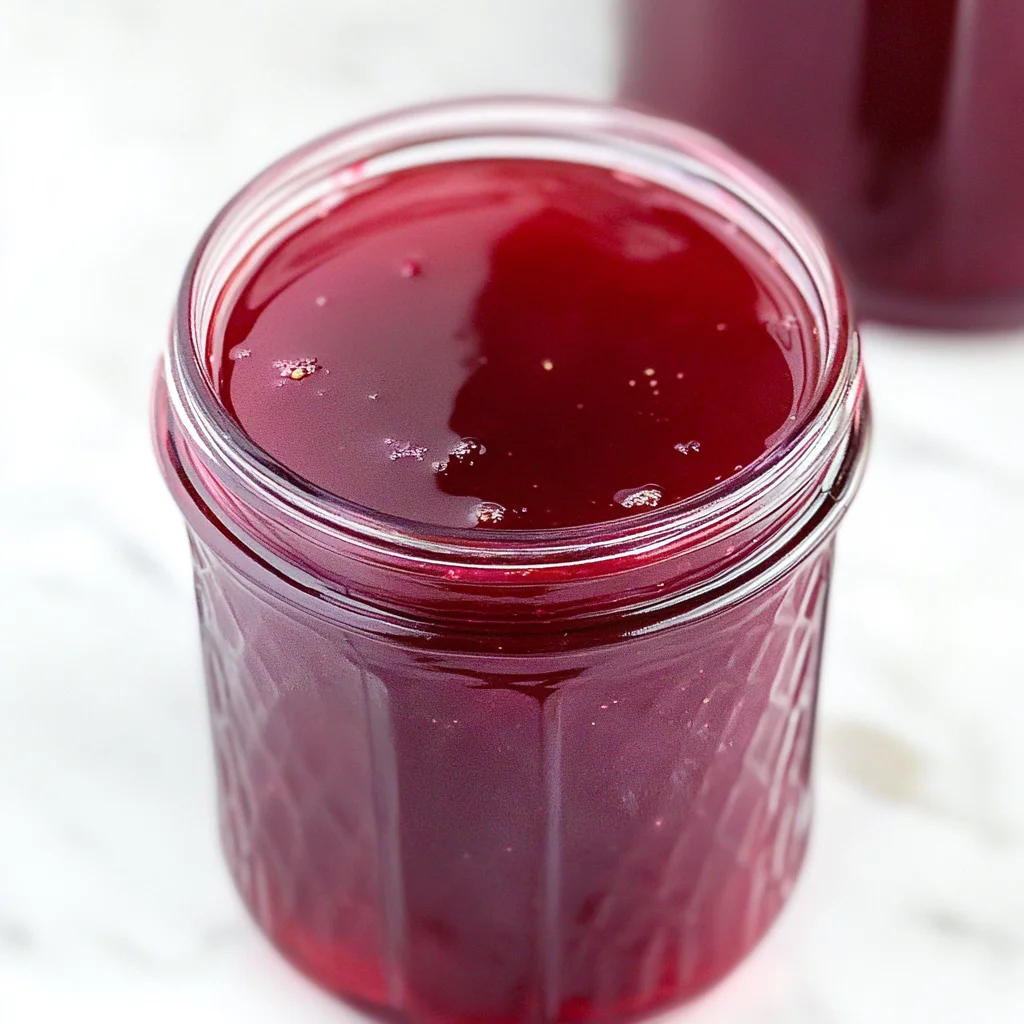
Ingredients
To create your delightful Homemade Plum Jelly, you’ll need the following ingredients:
For the Jelly
- 5 pounds ripe plums
- 1-1/2 cups water
- 1 (1.75 ounce) box fruit pectin
- 1 tablespoon unsalted butter
- 6-1/2 cups granulated sugar
How to Make Homemade Plum Jelly
Step 1: Prepare the Plums
- Slice the plums in half and remove and discard the pits. Don’t bother peeling the plums.
- Place the plums in a large stockpot. Add the water.
Step 2: Cook the Plums
- Bring the pot to a boil, then cover it and simmer over medium heat for 10 minutes.
Step 3: Strain the Juice
- Strain the juice by pouring it first through a colander.
- Then pour it again through a fine mesh strainer or line a colander with several layers of cheesecloth.
- Allow the fruit to drain for at least 30 minutes, then discard the leftover fruit.
Step 4: Combine Ingredients
- You should have about 5 ½ cups of plum juice. Pour this juice back into the pot.
- Add one box of pectin and the butter.
Step 5: Boil and Add Sugar
- Bring the mixture to a hard rolling boil.
- Add all of the sugar at once and continue to boil for one minute.
- Remove from heat and skim any foam from the top with a metal spoon.
Step 6: Jar Your Jelly
- Ladle your hot jelly into clean jars while it’s still warm.
- Seal tightly and store in the refrigerator where it can last up to six months.
Enjoy your delicious homemade plum jelly on toast, in desserts, or as part of various recipes!
How to Serve Homemade Plum Jelly
Homemade plum jelly is a versatile treat that enhances various dishes and can be enjoyed in many ways. Here are some delightful serving suggestions to elevate your culinary experience.
On Toast or Bread
- Spread a generous layer of homemade plum jelly on warm toast or a slice of fresh bread for a simple yet delicious breakfast or snack.
As a Glaze for Meats
- Brush homemade plum jelly over grilled chicken or turkey to add a sweet, tangy glaze that complements savory flavors perfectly.
In Yogurt or Oatmeal
- Swirl a spoonful of plum jelly into creamy yogurt or oatmeal for a tasty and nutritious breakfast option, providing both flavor and sweetness.
With Cheese
- Serve homemade plum jelly alongside cheese platters. It pairs particularly well with soft cheeses like cream cheese or goat cheese, offering a delightful contrast.
As Part of Desserts
- Use homemade plum jelly as a topping for desserts like cheesecake, ice cream, or panna cotta, adding a fruity element that enhances the overall taste.
In Salad Dressings
- Incorporate plum jelly into homemade salad dressings for a sweet twist. It works beautifully with vinegar and olive oil for drizzling over mixed greens.
How to Perfect Homemade Plum Jelly
Achieving the perfect homemade plum jelly requires attention to detail and technique. Follow these tips to enhance your jelly-making process.
- Use ripe plums: Selecting fully ripe plums ensures maximum flavor extraction during cooking.
- Measure accurately: Precision in measuring juice and sugar is crucial for the right consistency and sweetness.
- Avoid stirring while boiling: Once you add the sugar, refrain from stirring to prevent crystallization and ensure a smooth texture.
- Check doneness: Use the plate test method—place a small amount of hot jelly on a cold plate; if it sets up, it’s ready to jar.
- Store properly: Make sure jars are clean and sterilized to prolong shelf life. Seal tightly after cooling.
- Experiment with sweetness: Adjust sugar levels based on your preference; you can substitute honey or alternative sweeteners if desired.
Best Side Dishes for Homemade Plum Jelly
Homemade plum jelly pairs well with various side dishes that complement its sweet and tangy flavor. Here are some excellent options.
- Roasted Vegetables
Roasting carrots, bell peppers, and zucchini brings out their natural sweetness, making them an ideal side dish alongside the fruity notes of plum jelly. - Mashed Potatoes
Creamy mashed potatoes provide a rich base that balances the tartness of the jelly when served together on the plate. - Grilled Asparagus
The slight char from grilling asparagus adds depth; drizzle with plum jelly for an unexpected burst of flavor. - Coleslaw
A refreshing coleslaw made with cabbage and carrots offers crunch and acidity that pairs beautifully with sweet homemade plum jelly. - Quinoa Salad
A light quinoa salad mixed with herbs, vegetables, and a hint of citrus enhances the overall meal experience when accompanied by plum jelly. - Baked Sweet Potatoes
The natural sweetness of baked sweet potatoes harmonizes well with the flavors of homemade plum jelly, creating a comforting side dish. - Stuffed Bell Peppers
Savory stuffed bell peppers filled with grains or meats provide heartiness that contrasts nicely with the lightness of the fruit-based condiment. - Couscous Pilaf
Fluffy couscous pilaf seasoned with herbs serves as an excellent backdrop for enjoying dollops of fruity homemade plum jelly.
Common Mistakes to Avoid
Making homemade plum jelly can be fun, but there are common pitfalls to watch out for. Here are some mistakes to avoid:
- Skipping the pectin: Pectin is crucial for helping your jelly set. Always ensure you use the right amount according to the package instructions.
- Not straining juice properly: Inadequately strained juice can lead to a cloudy jelly. Use a fine mesh strainer or cheesecloth to get a clear juice.
- Ignoring temperature: Jelly needs to reach a hard rolling boil for proper consistency. Use a thermometer if needed to ensure you’re at the right temperature.
- Using old fruit: Fresh, ripe plums yield the best flavor and texture. Avoid using overripe or bruised fruit, which can affect the taste of your jelly.
- Forgetting to skim foam: Leaving foam in your jelly can alter its appearance and texture. Always skim off any foam before jarred storage for a clean finish.
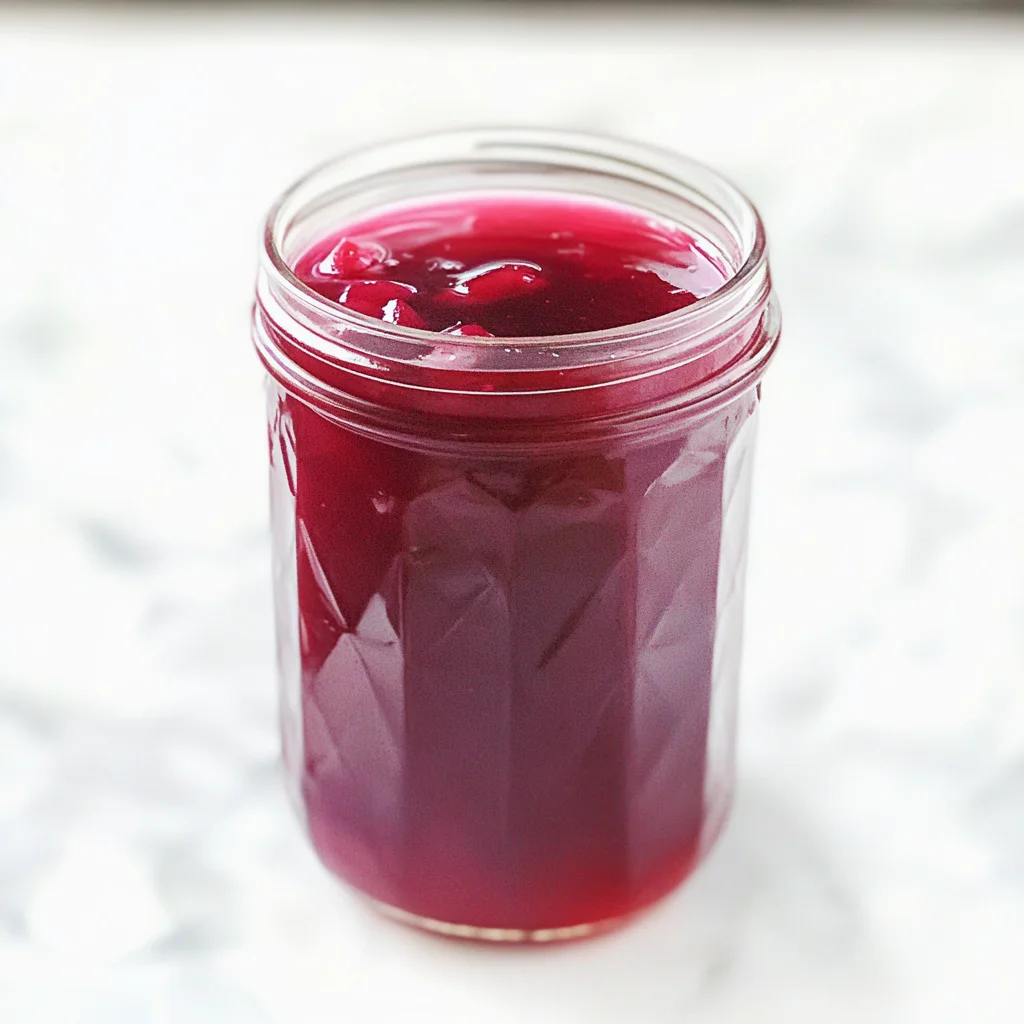
Storage & Reheating Instructions
Refrigerator Storage
- Store homemade plum jelly in clean jars with tight-fitting lids.
- It can last up to six months in the refrigerator.
Freezing Homemade Plum Jelly
- For long-term storage, freeze in airtight containers.
- Homemade plum jelly can be frozen for up to a year without losing quality.
Reheating Homemade Plum Jelly
- Oven: Place jars in an oven-safe dish and heat at low temperatures until warm.
- Microwave: Heat in short intervals, stirring in between until it reaches your desired temperature.
- Stovetop: Gently warm on low heat, stirring frequently to avoid scorching.
Frequently Asked Questions
Here are some common questions about homemade plum jelly that might help you:
How do I make homemade plum jelly from scratch?
To make homemade plum jelly from scratch, follow the recipe provided above. Ensure you use fresh plums and follow all steps carefully for best results.
Can I use less sugar in my homemade plum jelly?
Yes! You can reduce sugar or substitute with honey or other sweeteners. Just note that this may alter the final texture and sweetness level of your jelly.
What should I do if my jelly doesn’t set?
If your homemade plum jelly doesn’t set, consider re-cooking it with additional pectin following package instructions until it thickens appropriately.
How long does homemade plum jelly last?
Homemade plum jelly can be stored in the refrigerator for up to six months and frozen for up to a year if stored properly in airtight containers.
Final Thoughts
Homemade plum jelly is not only delicious but also incredibly versatile! Perfect as a spread on toast or used as a filling for desserts, this recipe allows room for customization with different sweeteners or spices. Try making it today and enjoy the delightful flavors of ripe plums!
Homemade Plum Jelly
Homemade Plum Jelly is a delightful way to capture the sweetness of ripe plums in a jar. This vibrant spread enhances breakfast toast, elevates desserts, and can even serve as a unique glaze for meats. With its luscious flavor and easy preparation, this jelly will be a favorite addition to your kitchen. Using simple ingredients that you likely have on hand, making your own plum jelly is not only rewarding but also allows for customization in sweetness and texture. Whether you’re enjoying it yourself or gifting it to friends and family, this homemade treat is sure to impress!
- Prep Time: 20 minutes
- Cook Time: 25 minutes
- Total Time: 45 minutes
- Yield: Approximately 12 servings (1 tablespoon each) 1x
- Category: Dessert
- Method: Canning
- Cuisine: American
Ingredients
- 5 pounds ripe plums
- 1–1/2 cups water
- 1 (1.75 ounce) box fruit pectin
- 1 tablespoon unsalted butter
- 6–1/2 cups granulated sugar
Instructions
- Slice the plums in half, discard the pits, and place them in a large stockpot with water.
- Bring to a boil, cover, and simmer for 10 minutes.
- Strain the juice through a colander followed by a fine mesh strainer or cheesecloth; let it drain for at least 30 minutes.
- Return about 5-½ cups of juice to the pot, add pectin and butter.
- Bring to a rolling boil, add sugar all at once, and boil for one minute.
- Ladle into clean jars while warm, seal tightly, and refrigerate.
Nutrition
- Serving Size: 1 serving
- Calories: 50
- Sugar: 13g
- Sodium: 0mg
- Fat: 0g
- Saturated Fat: 0g
- Unsaturated Fat: 0g
- Trans Fat: 0g
- Carbohydrates: 13g
- Fiber: 0g
- Protein: 0g
- Cholesterol: 0mg

Leave a Comment